Tumbling, deburring and edge breaks on small EDC parts
Burrs and sharp edges separate a pocket tool that feels finished from one that does not. How tumbling, brushing and hand deburring work and how to specify edges.
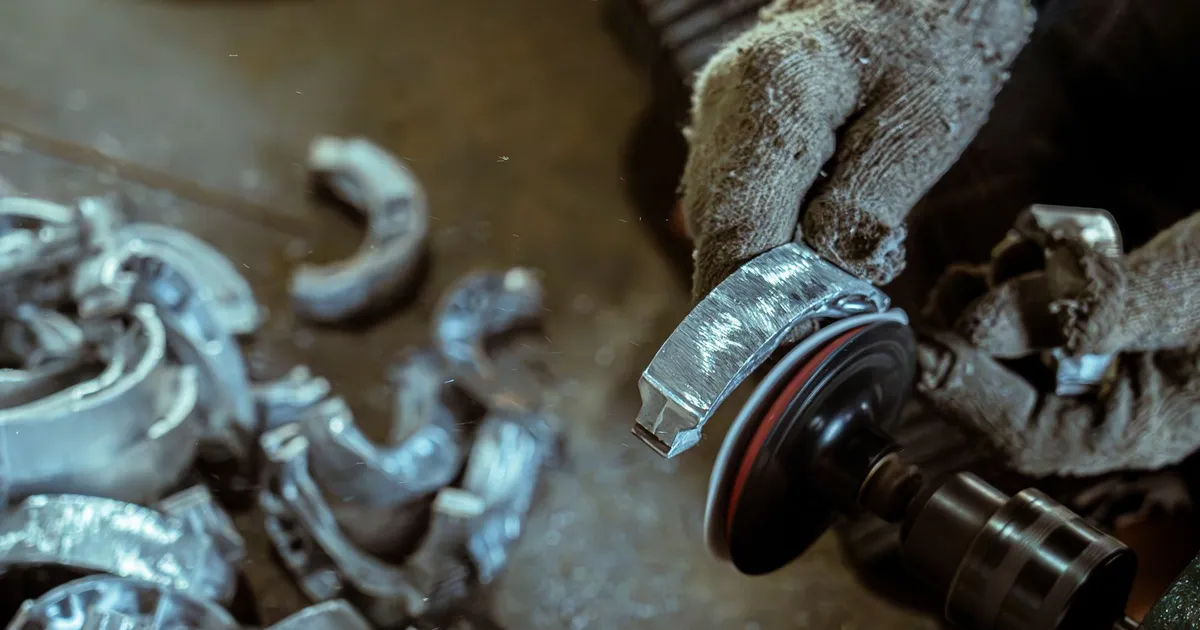
A buyer picks a part up and runs a thumb along the edge in the first second. If the edge bites, the part feels cheap whatever the tolerances say. Deburring and edge breaks are where small shops spend a surprising share of labour, and where a clear drawing note saves the most money.
What a burr is and why it forms
A burr is a thin ridge of metal pushed out of the cut instead of being sheared off. Every cutting tool leaves some at the exit side of a cut: at the edge of a pocket, at the mouth of a drilled hole, where two cuts meet. Soft and gummy metals such as aluminium, copper and Grade 2 titanium form larger burrs than hard ones.
An edge break is the opposite. It is a small deliberate chamfer or radius put on an edge so that it is safe to touch and does not chip. On EDC parts it is also a styling choice.
Common methods
- Hand deburring. An operator with a scraper, file, abrasive pad or rotary tool works each part. It is flexible and precise and the most expensive per part.
- Machine deburring. A chamfer tool or a small cutter in the CNC program runs along the edge. Consistent and cheap once programmed. Works only on edges the tool can reach.
- Brushing. Abrasive nylon or wire brushes on the machine or a bench. Good for light burrs on flat faces and the mouths of holes.
- Tumbling. Parts are run in a barrel or a vibratory bowl with media. The media rub every accessible surface and round the edges slightly. Cheap per part and consistent across a batch.
- Bead blasting. Glass beads or ceramic fine media blast the surface. It removes very light burrs and gives a matte look.
- Electropolishing. For stainless parts. It dissolves a micron-scale layer and smooths micro-burrs. Not used on titanium in the same way.
How tumbling works on small parts
A vibratory bowl or a rotary barrel is filled with media such as ceramic chips, plastic pyramids or steel shot, plus water and a compound. The parts are added and the machine runs for anything from half an hour to many hours.
Three variables set the result:
- Media type and size. Hard ceramic cuts faster. Plastic media polishes. Media must be small enough to reach into pockets and larger than any hole so that it cannot jam.
- Time. The longer the cycle, the rounder the edge.
- Loading. Too many parts and they hit each other. Too few and the process is slow.
The edge radius that results from tumbling is typically in the order of a tenth of a millimetre or less. It is the same on every part, which is the main attraction.
What tumbling cannot do
- It does not reach deep internal features such as the bottom of a blind hole or the root of a thread.
- It dulls sharp features by design. Jimping, knurl crests and sharp pivot shoulders can lose their edge definition. See knurling, jimping and grip textures.
- It can cause part-on-part damage on delicate or heavy parts. Small thin parts such as pocket clips can bend or mark each other and may need a separator or a hand finish.
- It changes dimensions slightly. A fit that is held to a few microns should be checked after tumbling.
Knife blades should not be tumbled after the edge grind. The cutting edge would be rounded.
Specifying the edge
The drawing note that causes the most trouble is “break all sharp edges”. It means different things to different people. Better options:
- A size. “Edge break 0.2 mm maximum, all external edges” gives the operator a number.
- A range. “0.1 to 0.3 mm” accepts both a chamfer and a radius within that size.
- An exception list. Name the edges that must stay sharp, such as a seating shoulder or a blade ricasso.
- An edge symbol. ISO 13715 gives symbols for edge condition on drawings and states the permitted burr or undercut size. Check the current edition and quote the standard if you use it.
Without any note, the shop will deburr to its own habit, which may be too little for your customer.
Order of operations
The sequence matters on EDC parts:
- Machine and deburr on the machine where possible.
- Hand deburr internal edges and any area the barrel cannot reach.
- Tumble or bead blast for a uniform edge and surface.
- Anodize or coat if required.
- Final inspect and pack.
Tumbling after anodizing can remove colour from the edges. Deburr first. See stonewash, bead blast and anodize for how the surface finish sets the look.
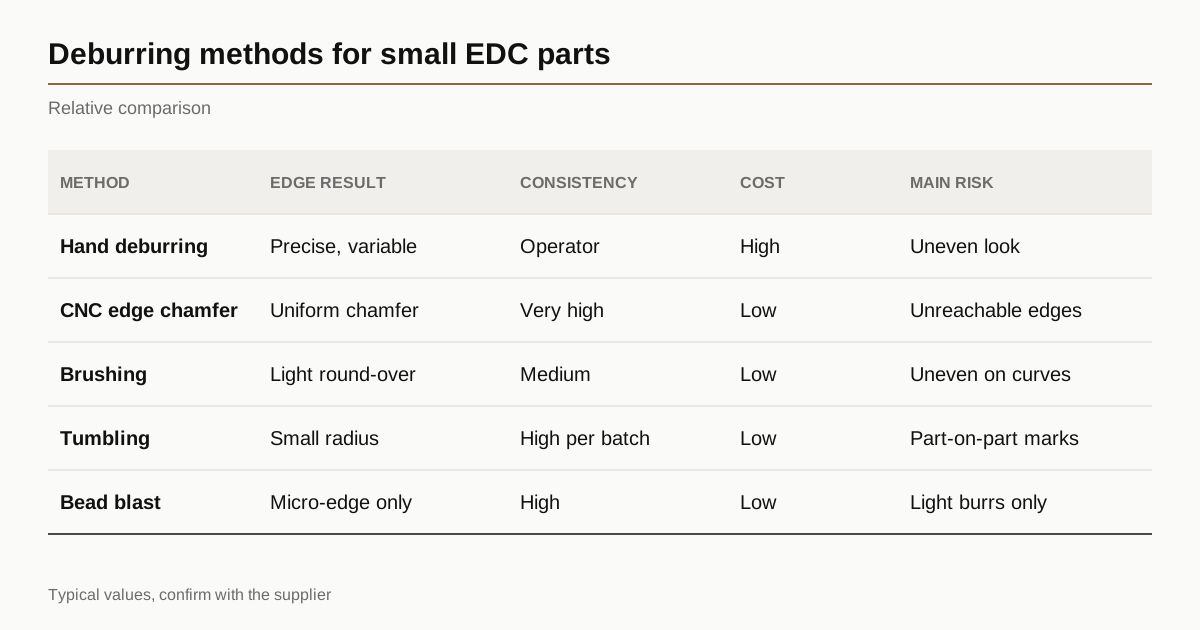
A comparison table
Typical relative figures, to help compare methods.
| Method | Edge result | Consistency | Relative cost | Main risk |
|---|---|---|---|---|
| Hand deburring | precise, variable | operator dependent | high | inconsistent look |
| CNC edge chamfer | sharp, uniform chamfer | very high | low after programming | unreachable edges |
| Brushing | light round-over | medium | low | uneven on contours |
| Tumbling | small radius | high across batch | low | part-on-part marks |
| Bead blast | micro-edge only | high | low | removes only light burrs |
Cosmetic risk on first articles
On a first run, ask for a small number of parts with each edge condition you are considering and look at them side by side. A first article that has been tumbled can look quite different from one deburred by hand, and the choice is easier with the parts in hand than with a drawing. Photos with a scale bar help the conversation when the shop is in another country.
What to write in the RFQ
- Edge break size and range, and which edges are exempt
- Whether tumbling is allowed and whether any features must not be rounded
- Surfaces that need a cosmetic grade, see cosmetic inspection of EDC parts
- Order of finishing steps
- Parts that are fragile or easily marked
- Reference sample or photo of the desired edge
Send the drawing with an edge note and the shops in the network will reply within 24 business hours.
FAQ
What is a typical edge break on an EDC part? Many drawings call for 0.1 to 0.3 mm. The right size depends on the part and the look you want.
Can titanium parts be tumbled? Yes. Titanium tumbles slowly and may need longer cycles or harder media. Bead blasting is more common for its look.
Does tumbling remove tool marks? It softens light marks but does not remove deep ones. Fix those in the machining step.
Should tumbling happen before anodizing? Yes. Tumbling after anodizing wears colour off edges.
Is hand deburring worth the cost? For small batches of premium parts, yes. For large batches, ask for a tumbling and brushing route with hand finishing only on unreachable edges.